I am sure before you landed here, you probably went through a few Salesforce Outlook Integration guides already. Or maybe even opened five or six tabs that Google threw at you. Am I right? Maybe you are smiling right now.
Well, I hope that smile turns into action by the time you finish this one.
Because here is the truth. Most guides out there say the same thing, and that is fair because the fundamentals of Salesforce Outlook Integration do not really change. What truly matters is how you implement it and whether you actually get value out of it once it is running.
So, while most guides aim not to reinvent the wheel, this one actually does at least a little. We are going to revisit the fundamentals, but in a way that feels new, practical, and built entirely around your perspective. By the time you close this tab, you will not only understand what Salesforce Outlook Integration does, but you will also know how to make it truly work for you without getting lost in setup screens or Salesforce jargon.
This guide will cover all the essentials, but with one goal in mind; to help you get it right the first time. We will go over everything you need to set it up, optimize it, and make sure your sales team actually benefits from it ... not just check a box saying it is installed.
Let us get started.
Before You Begin Let’s Do the Ground Check
Before you start syncing, connecting, or logging in, pause for a moment and make sure you have the essentials ready. There are a few things you must check and set up first. Because if the beginning goes wrong, what you build won’t last long.
That’s true for Salesforce Outlook Integration too. A solid foundation decides how smooth everything that follows will be. So before we jump into the steps, let’s go through what you need to prepare first.
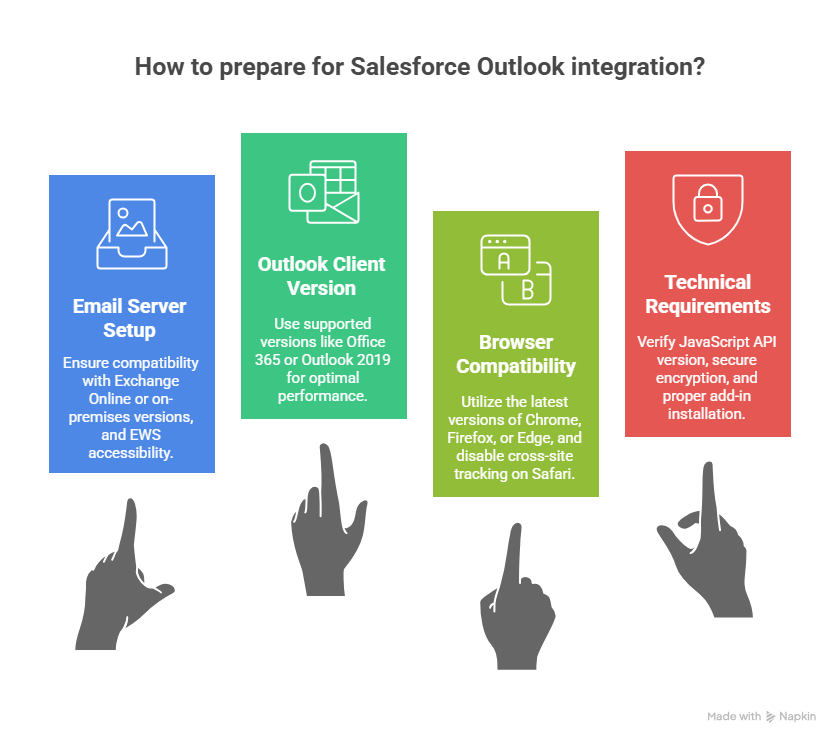
Email Server
Before you start connecting Salesforce with Outlook, take a minute to make sure your email server setup is ready. If this part goes wrong, everything that follows will feel like pushing a boulder uphill. Here’s what to check:
- Go with Exchange Online using Office 365. It’s the smoothest and most reliable option for this integration.
- On-premises Exchange 2019, 2016, or 2013 works too. Just make sure it’s properly configured and updated.
- Running a hybrid setup? That’s fine. Salesforce supports mixed environments where some mailboxes are on-prem and some are in the cloud.
- Using Exchange Online GCC High? That’s supported as well, but skip Salesforce Inbox in that case since it doesn’t work together.
- Avoid IMAP or POP3. These mail servers are not supported for Salesforce Outlook integration, so you can rule them out right away.
- Make sure Exchange Web Services (EWS) is accessible. Salesforce needs EWS to talk to your email server, so keep it enabled and reachable.
- Stay current. Older Exchange versions or missing security updates can block key features. Check that your server meets the latest Salesforce and Microsoft requirements.
Supported Outlook Clients
Before you move ahead with the setup, double-check the Outlook version your team is using. Some versions work perfectly, while others are past their support window. Here’s what you need to know:
- Office 365, Office 2021, and Outlook 2019 retail versions are your best options. They’re fully supported and give the smoothest experience.
- Outlook on the web (OWA) works great too. It connects easily with Salesforce and supports all key features.
- Outlook for Mac 2016 or 2019 is supported, whether you’re using the newer or legacy version.
- Outlook 2013, 2016, or volume-licensed Outlook 2019 versions are no longer supported. You can still use them, but Salesforce won’t provide fixes or updates anymore.
- If you’re still on older versions, consider upgrading. Office 365 or retail Outlook 2019/2021 gives you better security, smoother integration, and full access to Salesforce’s latest add-in features.
Supported Browsers
Your browser plays a big role in how smoothly Salesforce and Outlook work together. Before you start testing or syncing, make sure your browser setup checks all the right boxes:
- Use the latest version of Chrome, Firefox, Edge, or Safari. Salesforce works best with their current stable releases.
- If you’re on Safari, turn off cross-site tracking. It can block Salesforce connections and cause integration hiccups.
- Firefox users should add domain exceptions to let Salesforce access everything it needs.
- Avoid private or incognito mode. Salesforce add-ins don’t run properly in those sessions.
- Skip older browsers. Internet Explorer 11 and the old (non-Chromium) version of Edge are not supported.
- Keep an eye on extensions. Any plugin that changes web pages (like DOM manipulation tools) can cause crashes or weird behavior.
- Stick to the latest stable versions. Updates fix bugs and keep Salesforce Lightning and Outlook integration running smoothly.
- Using a phone or tablet? Use the official Salesforce mobile app instead of a mobile browser for the best experience.
Technical Requirement
A few technical details can make or break your Salesforce Outlook integration. Make sure these are sorted before you dive in:
- Check your JavaScript API version. Your Outlook client should support version 1.4 or higher. If you’re not using a public Exchange Web Services (EWS) endpoint, make sure it’s at least version 1.8 for everything to work properly.
- Use secure encryption. Your email server must support TLS 1.2 or higher to keep data secure, especially if you’re using Salesforce Inbox.
- Install the Salesforce Outlook Add-in the right way. The easiest method is through Microsoft AppSource since it handles updates automatically.
- No AppSource access? Your Exchange admin can install the add-in using a manifest file or deploy it centrally through Microsoft’s admin center.
- Keep everything up to date. Make sure Outlook, Windows, and your security patches are current to avoid conflicts or missing features.
- Work with your admins. Some EWS configurations and permissions might need admin involvement to get set up correctly.
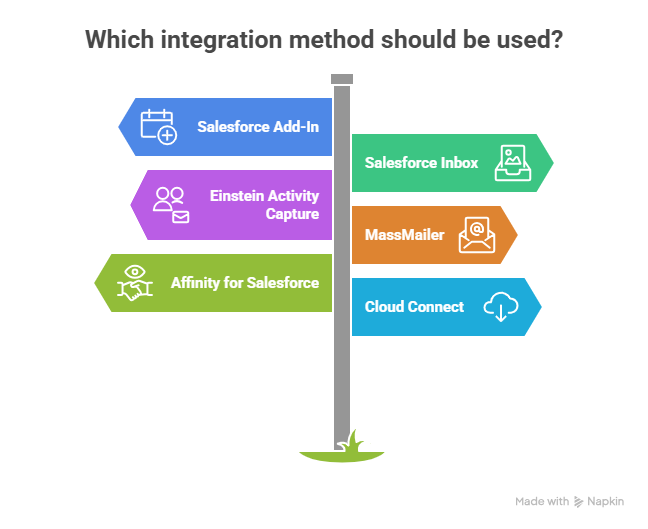
The Big Question: What Kind of Integration Do You Actually Need?
There isn’t one perfect way to connect Salesforce and Outlook. It depends on what your team does every day, how big your org is, and how automated you want things to be.
Here is a quick way to figure that out.
If you just want to log emails and sync your calendar:
Go with the Salesforce Add-In. It is free, native to Microsoft, and works for most Outlook 365 users.
If you live inside your inbox and want more control:
Choose Salesforce Inbox. It is a paid add-on that adds tracking, email templates, scheduling, and next-best-action insights. Great for high-volume sales reps.
If you want automation without manual effort:
Use Einstein Activity Capture (EAC). It automatically logs emails, contacts, and calendar events, backed by AI. It also keeps everything synced for 24 months.
If you need to send campaigns and track metrics:
Add MassMailer. It takes Salesforce’s native email limit of 5,000 per day and turns it into scalable campaigns with bounce tracking, drip automation, and detailed analytics.