Integration between HubSpot and Salesforce can look deceptively simple. At first glance, it feels like all you need to do is click a button and the data will flow seamlessly. But if you’re planning a DIY approach, here’s something you should know — it’s not always that smooth.
Once you switch it on, you may run into issues like:
- Huge data dumps: 50,000+ contacts from HubSpot suddenly land in Salesforce, overwhelming sales teams.
- Unqualified leads: Many contacts don’t have phone numbers or critical details, frustrating reps who expect sales-ready data.
- Duplicate records: Turning on the integration can instantly create thousands of duplicate companies or contacts.
- Data governance headaches: After activation, HubSpot no longer allows easy merging of duplicates. It becomes a manual, time-consuming process.
That’s why treating this integration as a plug-and-play solution often backfires. A little planning upfront can save you from messy data, angry sales calls, and hours of cleanup later.
How to Set Up HubSpot Salesforce Integration the Right Way
Well, everyone is going to tell you that setting up HubSpot and Salesforce integration requires thoughtful preparation, clear data mapping, and careful governance. But the reality is that it’s the same with almost any technology. If you just switch it on without planning, you’ll run into mess, duplicates, and frustrated teams. With a little structure upfront, though, this integration can run smoothly and deliver real value. Here’s how to do it step by step.
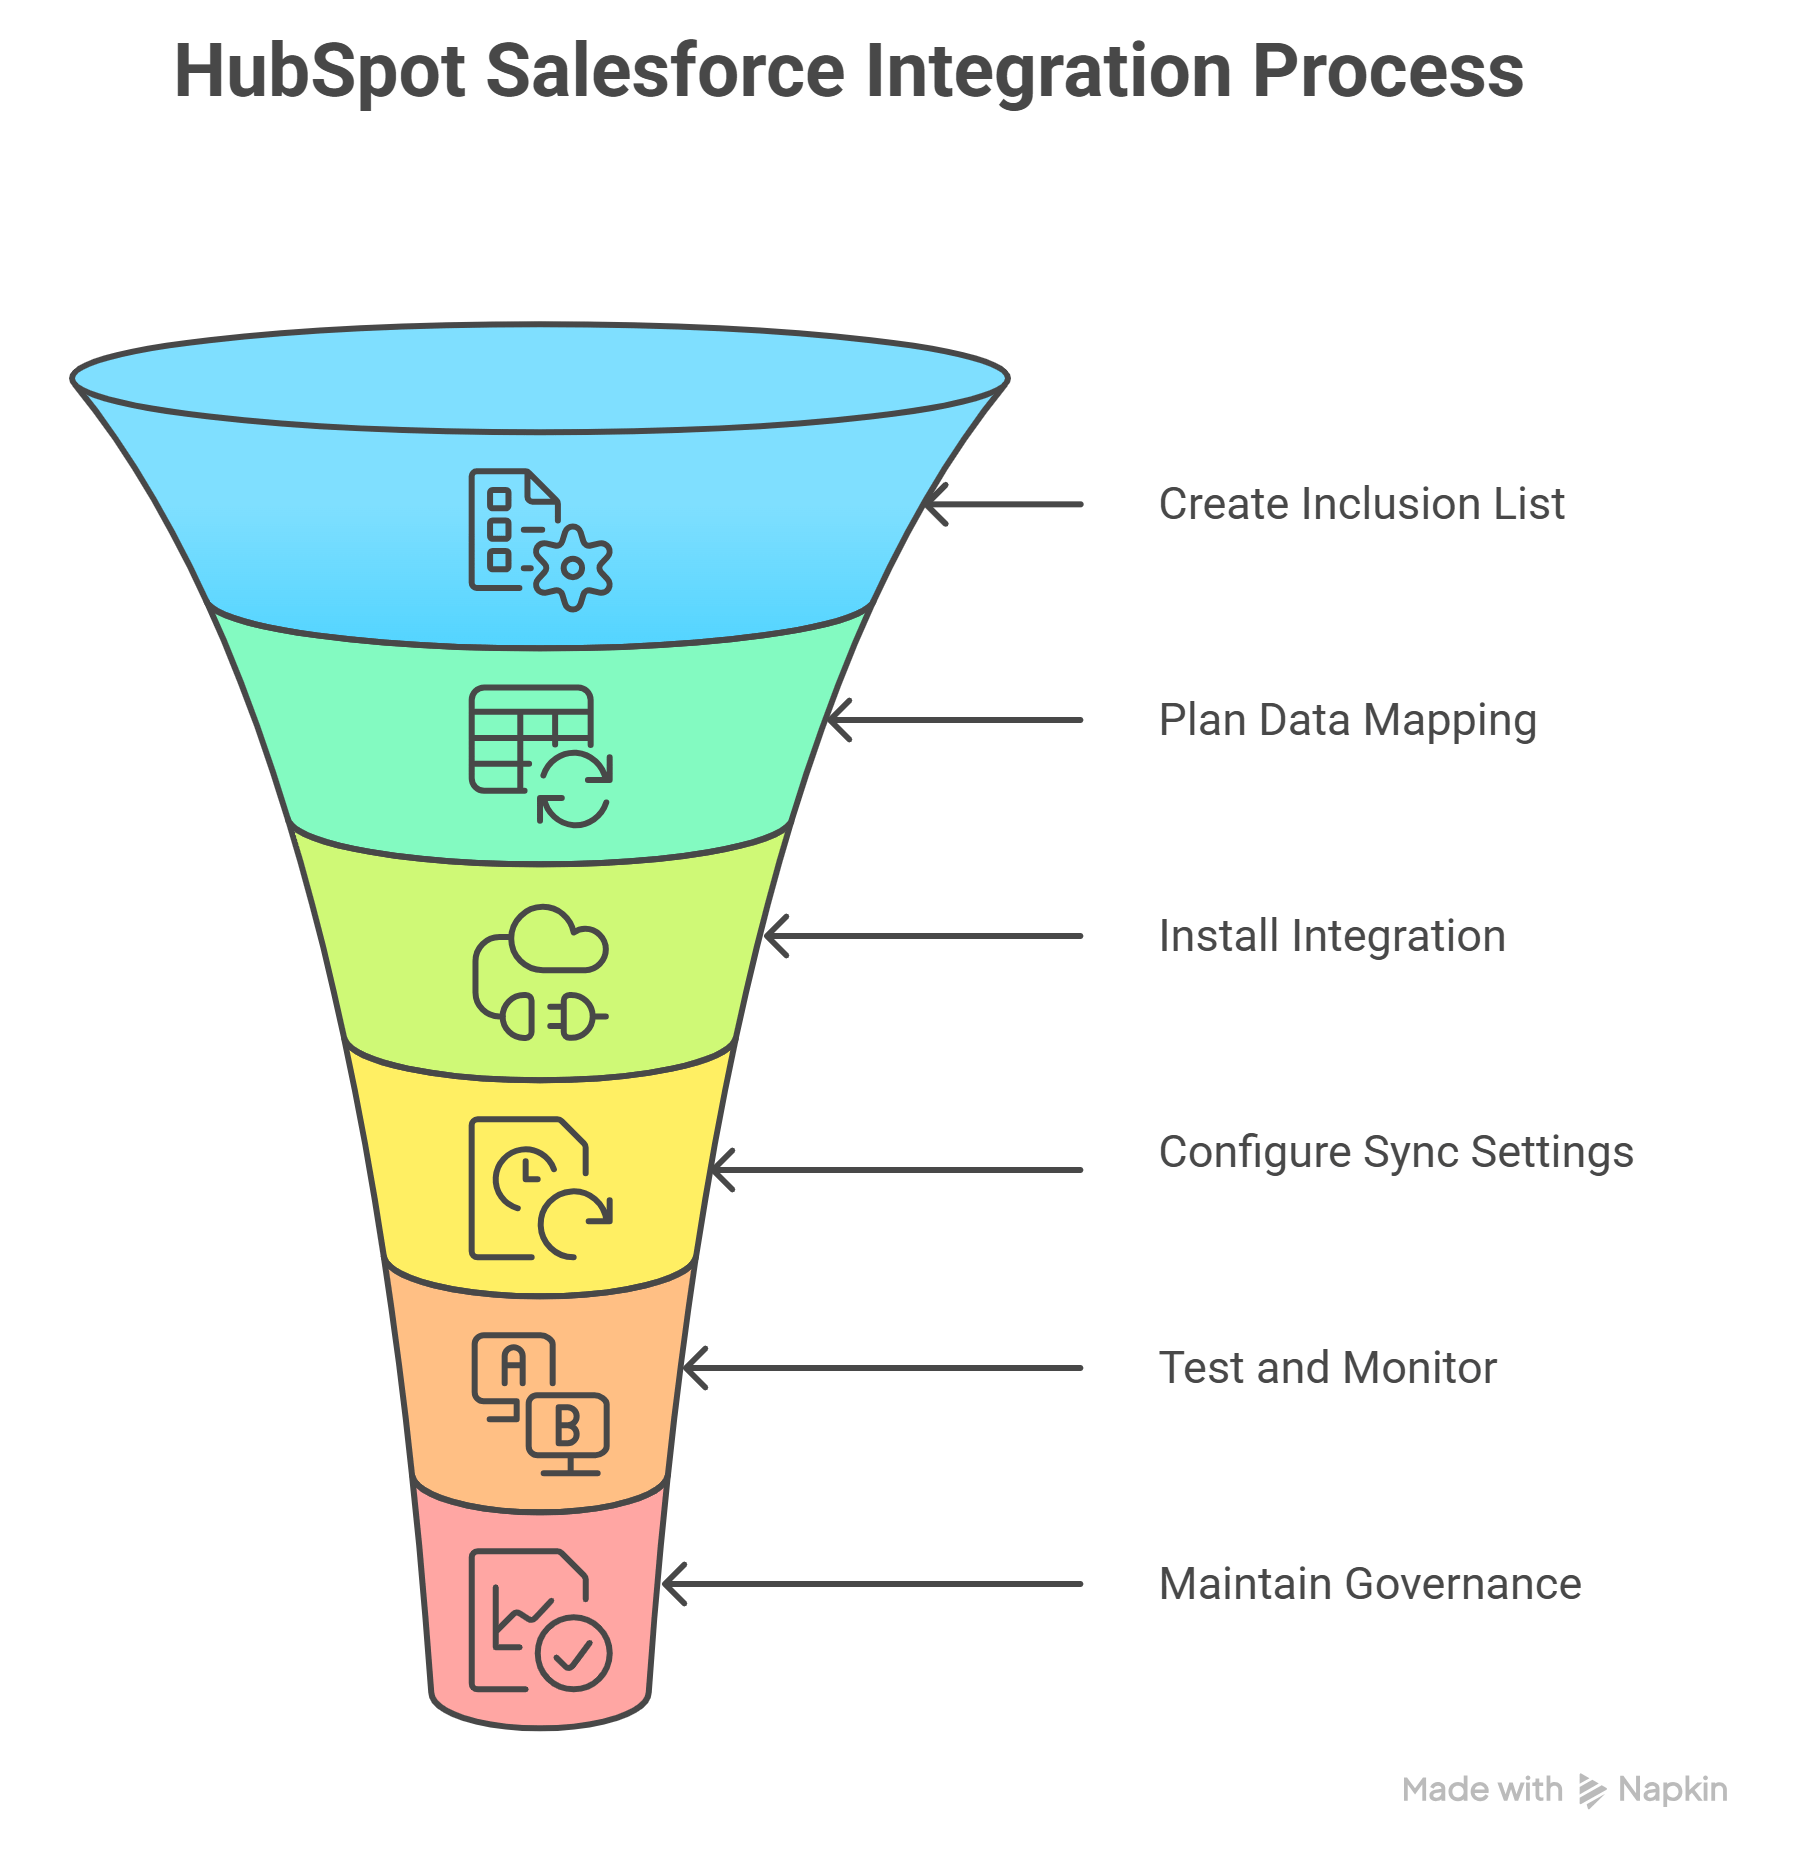
Step 1: Create an Inclusion List in HubSpot
Define what makes a lead eligible to move into Salesforce (the “inclusion list”).
Sync only Sales Qualified Leads (SQLs), not every HubSpot contact.
Use filters like lifecycle stage, lead score, or required fields (e.g., “Lead Score > 50” or “Lifecycle Stage = SQL”).
This ensures Salesforce stays clean and sales teams only focus on actionable prospects.
Step 2: Plan Data Mapping
Align HubSpot objects (Contacts, Companies, Deals) with Salesforce objects (Leads, Accounts, Opportunities).
Build a mapping spreadsheet: list HubSpot properties alongside their Salesforce field equivalents.
Decide on sync direction:
- One-way (Salesforce overrides HubSpot)
- Two-way (updates reflect in both systems)
Configure custom field mappings if you have unique data needed for reporting or workflows.
Step 4: Configure Sync Settings
Use HubSpot’s sync tools to manage API usage and error handling.
Adjust sync frequency and conflict resolution rules (decide which system “wins” in case of a mismatch).
Set sync direction for each object (one-way or bidirectional).
Always test with sample data before going live.
Step 5: Test and Monitor
Run a test sync, validate mapped fields, and fix any errors.
Once everything checks out, activate the sync for all records.
Use HubSpot’s integration dashboard and conduct regular audits to maintain accuracy.
Step 6: Maintain Ongoing Data Governance
Document data ownership clearly and review mappings on a monthly or quarterly basis.
Update integration settings as processes evolve.
Train teams on how the data flows between systems.
Monitor sync errors proactively to prevent duplicates and feedback loops.
Looking to integrate HubSpot and Salesforce the right way?
Common Pitfalls After HubSpot–Salesforce Integration
Overwritten Data and Data Loss
When two-way sync is enabled, HubSpot and Salesforce can overwrite each other’s records if sync rules aren’t clearly defined. For example, a PPC source tag in HubSpot may be replaced by incomplete Salesforce data, causing lost attribution and inaccurate campaign reporting.
Sync Errors and Validation Failures
Field rules differ between platforms. HubSpot allows unlimited text, while Salesforce enforces limits like 250 characters. Mismatched picklists, incompatible property types, or Salesforce workflow rules can block updates, creating failed syncs.
Duplicates and Unmatched Records
Contacts with slight variations in names, emails, or objects can create duplicate records in one or both systems. Parent-child relationships (like accounts, contacts, and deals) may also fail to sync correctly, breaking workflows and reports.
Permission and Access Issues
If the integration user in Salesforce lacks the right permissions, record updates and field changes may fail. Experts recommend using a dedicated integration user with full access to reduce errors.
Custom Object and Association Errors
HubSpot and Salesforce structure data differently (e.g., Contacts vs. Leads, Companies vs. Accounts). If objects aren’t mapped one-to-one, associations fail. Custom objects or automation logic can also block syncs or create mismatches.
Import and Format Problems
Poorly formatted imports, unverified emails, or placeholder data often fail during sync. Lists uploaded without aligned fields can prevent new records from being created.
Ongoing Monitoring and Maintenance
Integrations need constant oversight as new fields, rules, and processes are added. Without regular monitoring of error logs, permissions, and sync reports, small issues compound, leading to missing records and loss of trust between sales and marketing teams.
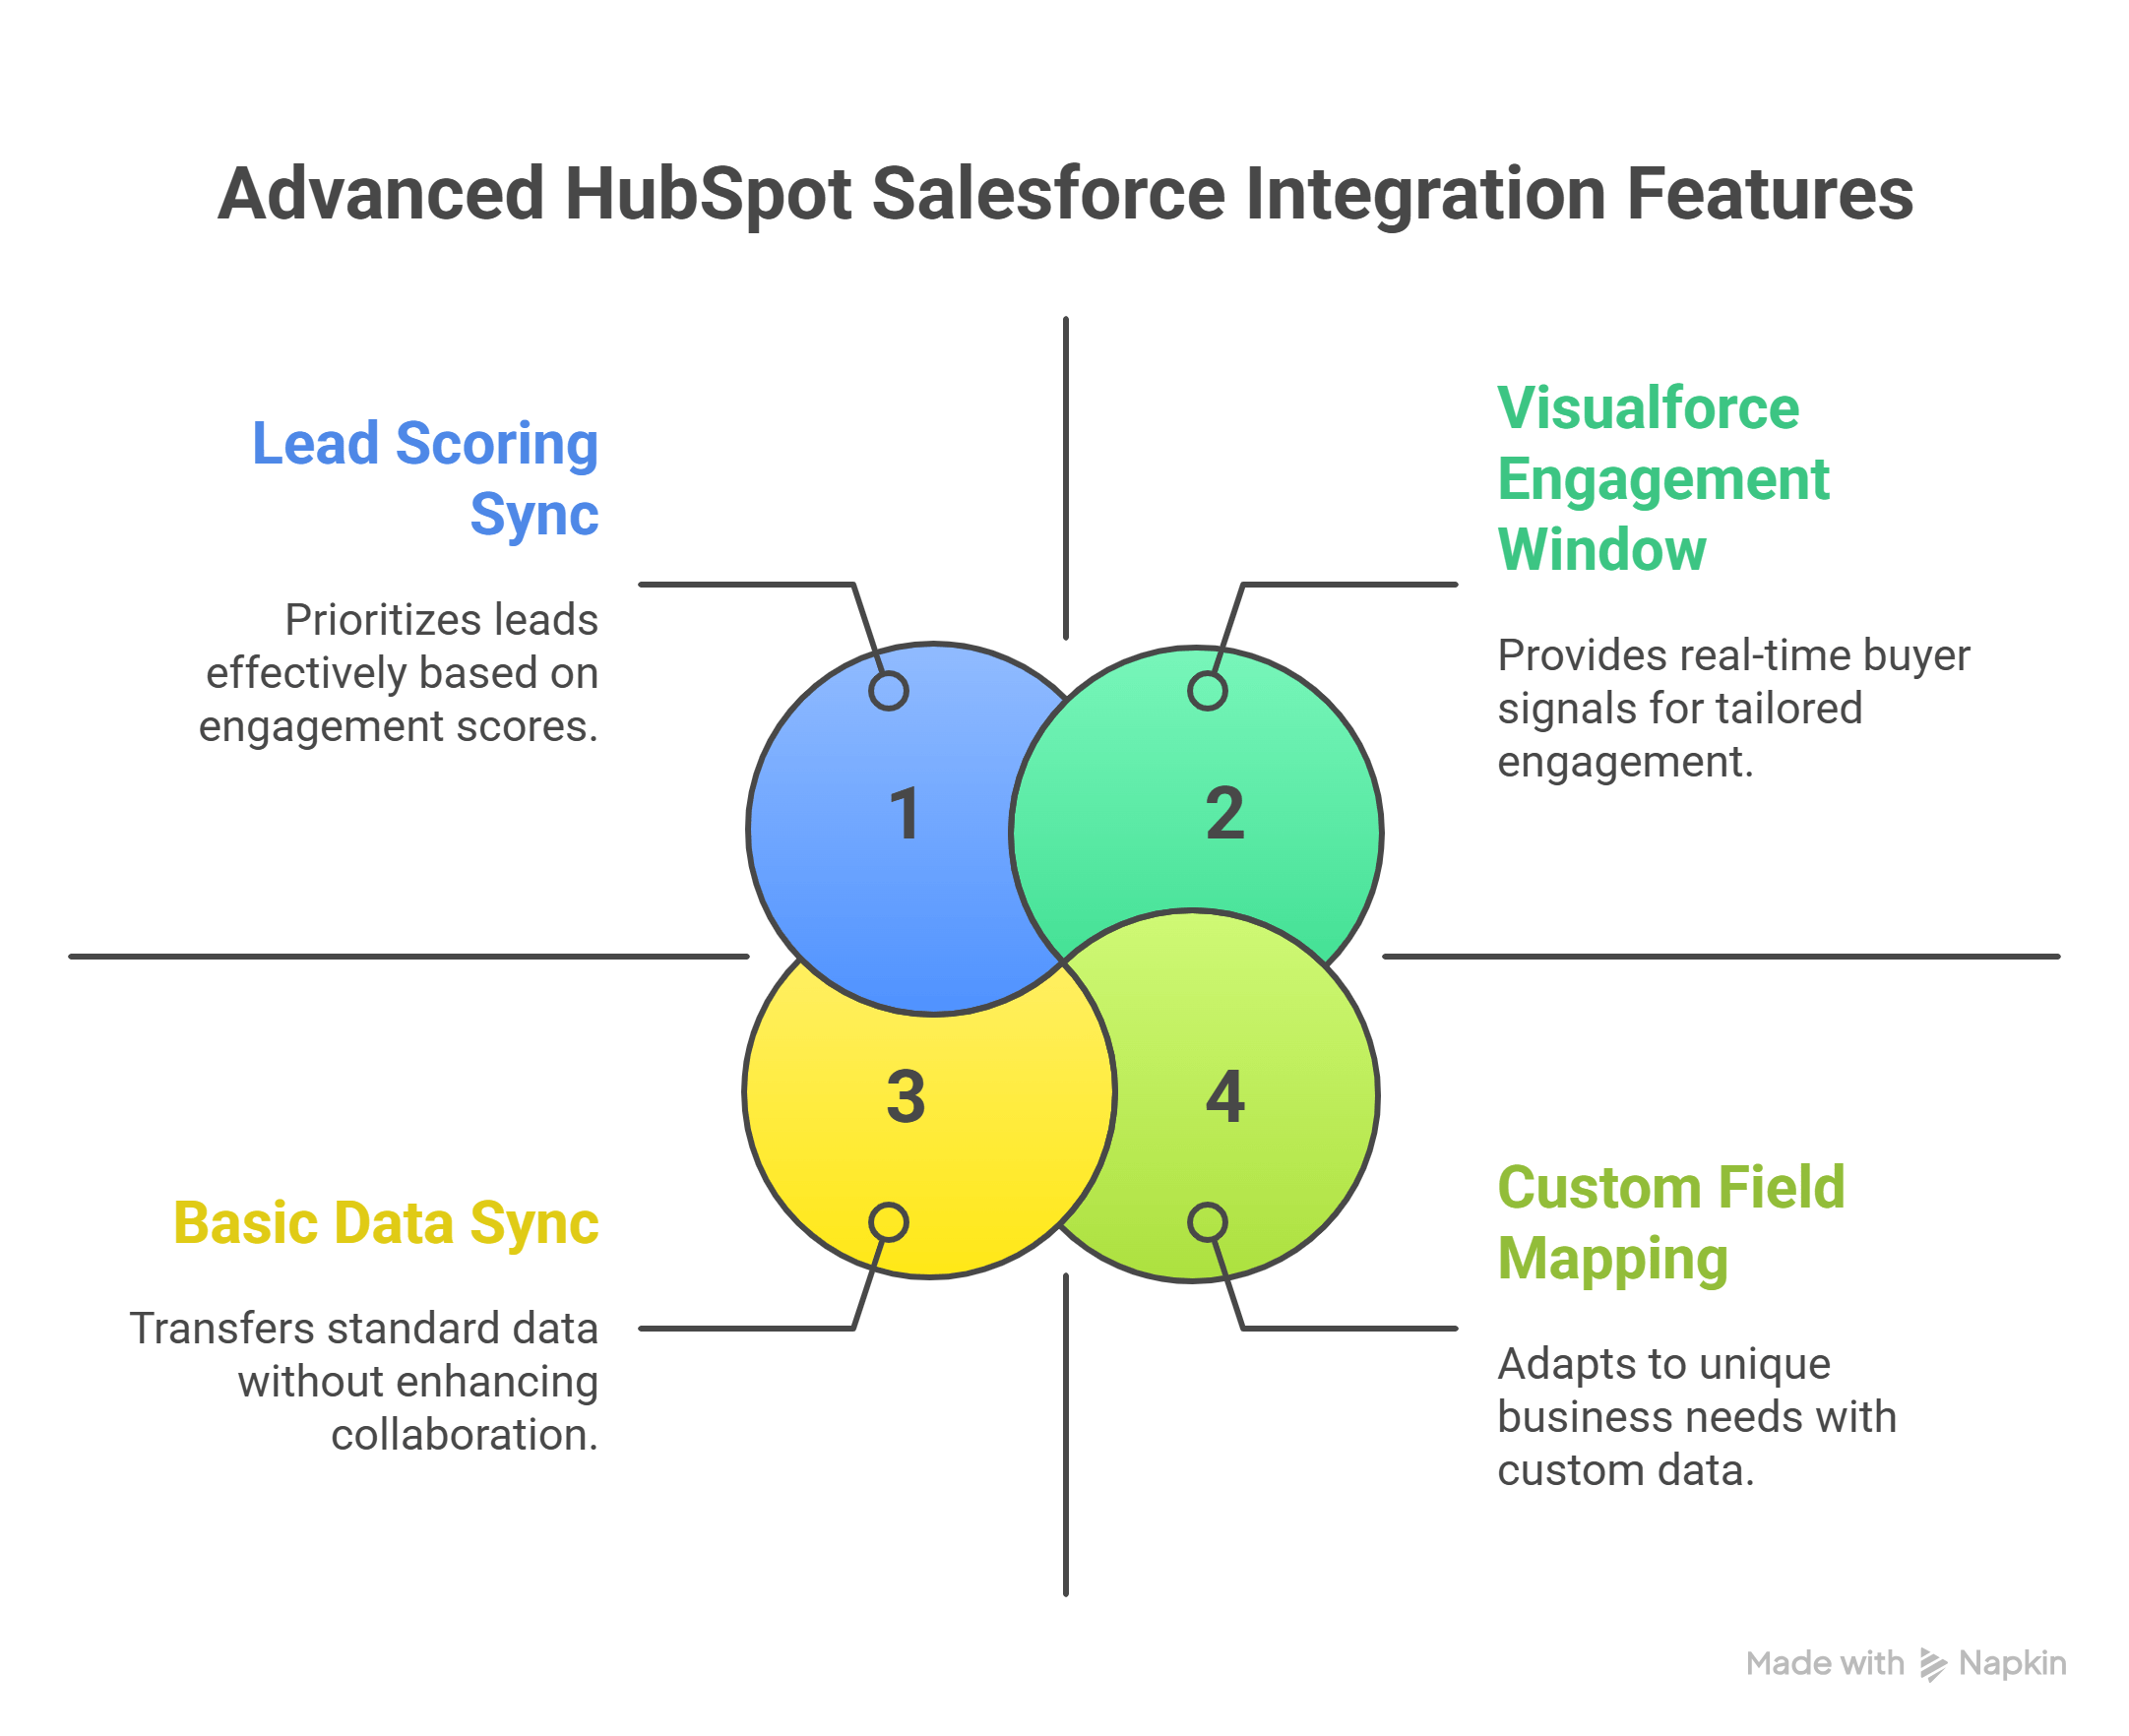
Beyond Basics: Advanced Features You Must Utilize
To get the most from your HubSpot Salesforce integration, you need to go beyond syncing contacts and leads. A basic integration simply moves data back and forth. You can see names, emails, and standard records in both systems, but it does little to change how sales and marketing actually collaborate.
Advanced features turn the integration into a shared intelligence engine. They give both teams context, clarity, and control. Here is how they differ from the traditional benefits of integration.